Create a task (phone version)
Learn how to create and customize tasks in PolyPlan with our comprehensive guide.
Written By Minh Thư
Last updated Over 1 year ago
Step 1: Initial Setup
Open PolyPlan on your device
Tap the plus (+) button at the bottom of the screen
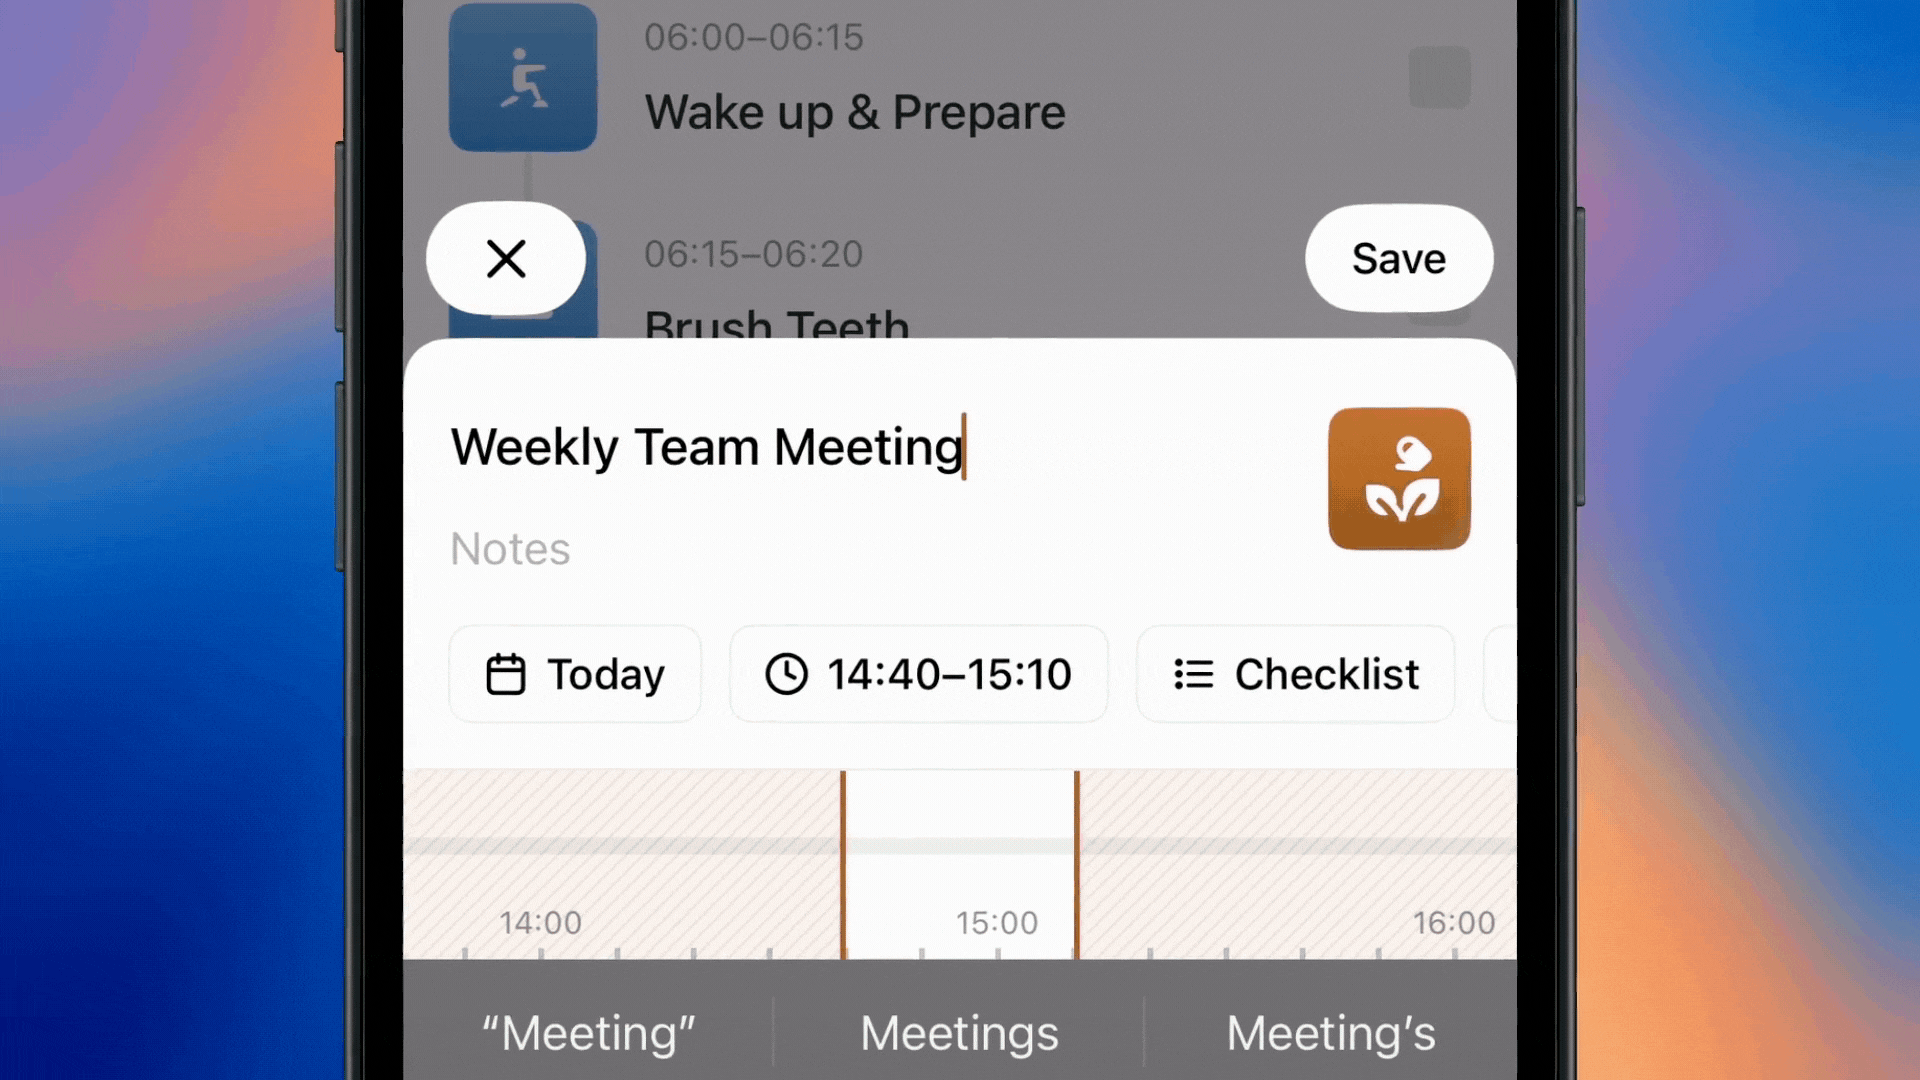
Enter your task name
PolyPlan will suggest an appropriate icon based on your task name. You can customize the icon and color to match your preferences
Step 2: Schedule Your Task
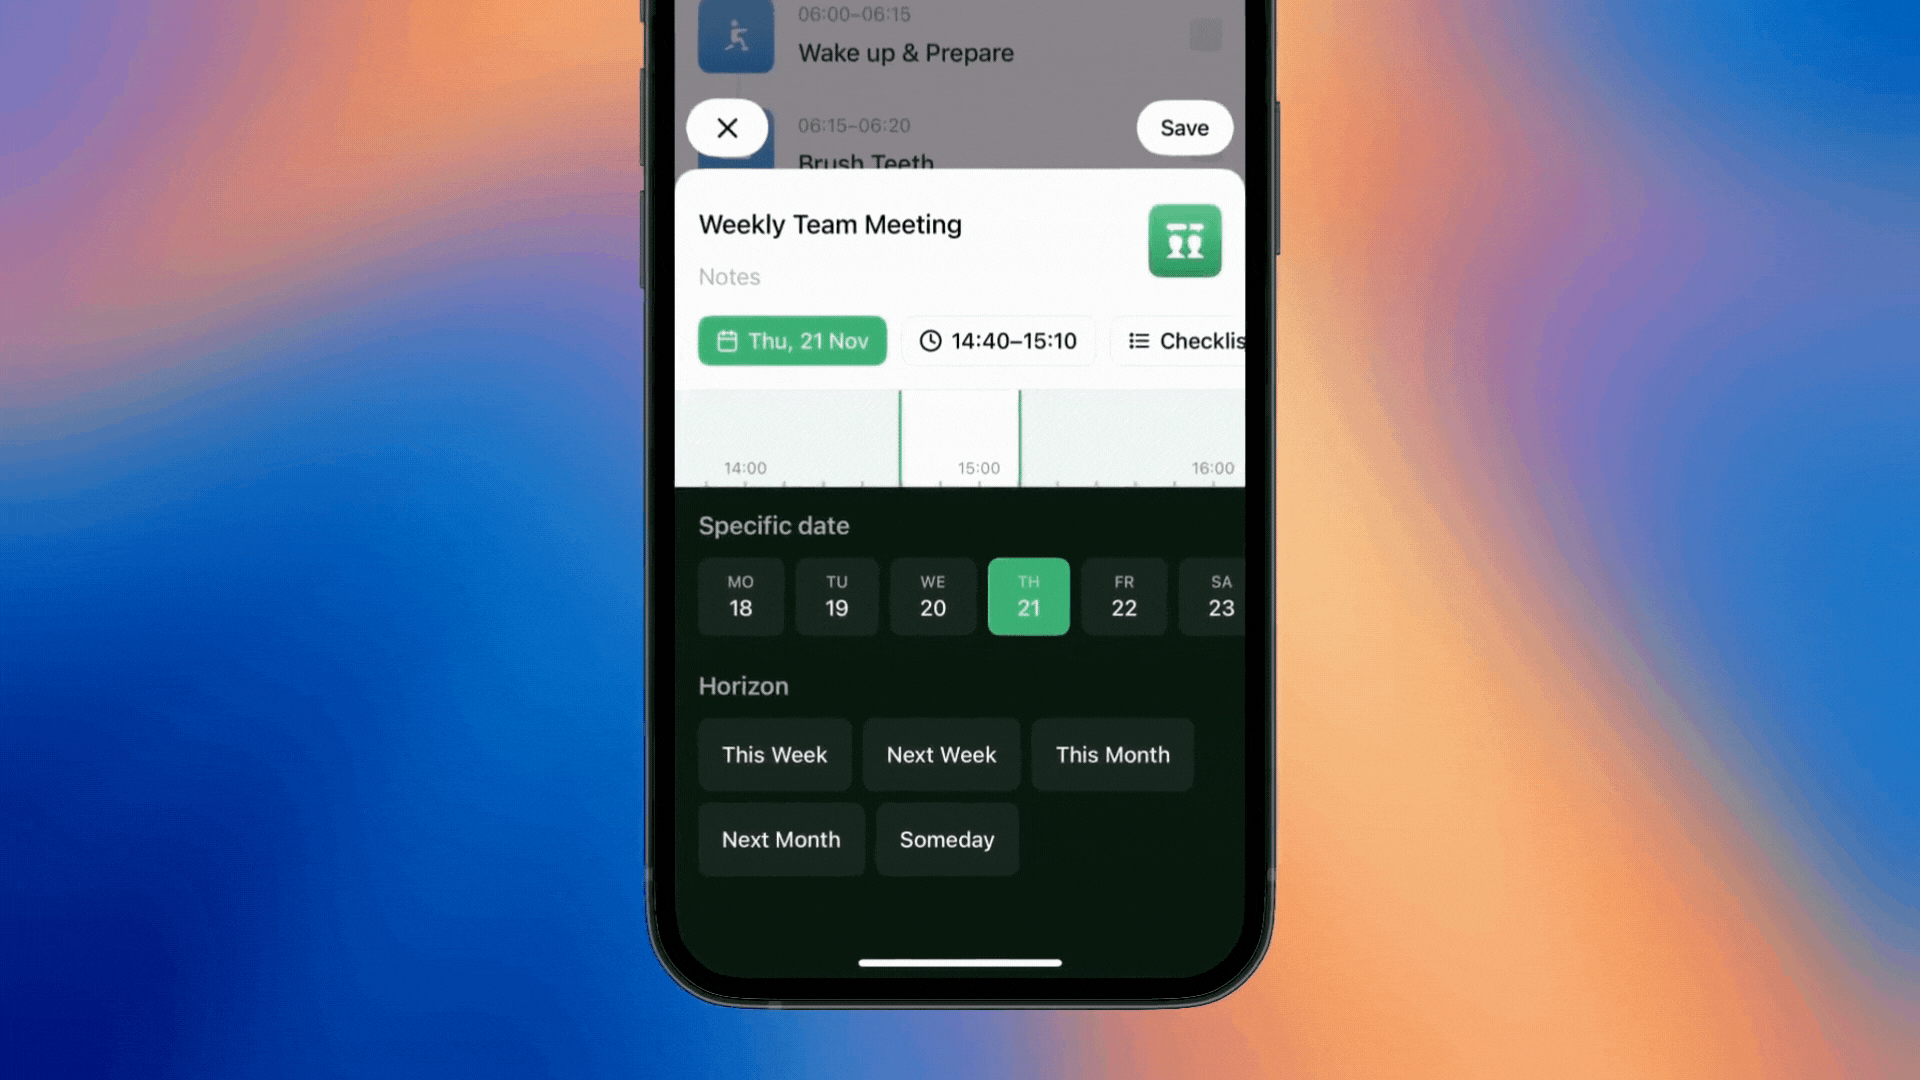
Choose your task date:
Select a specific date from the calendar, or
Pick a date from the horizontal timeline view
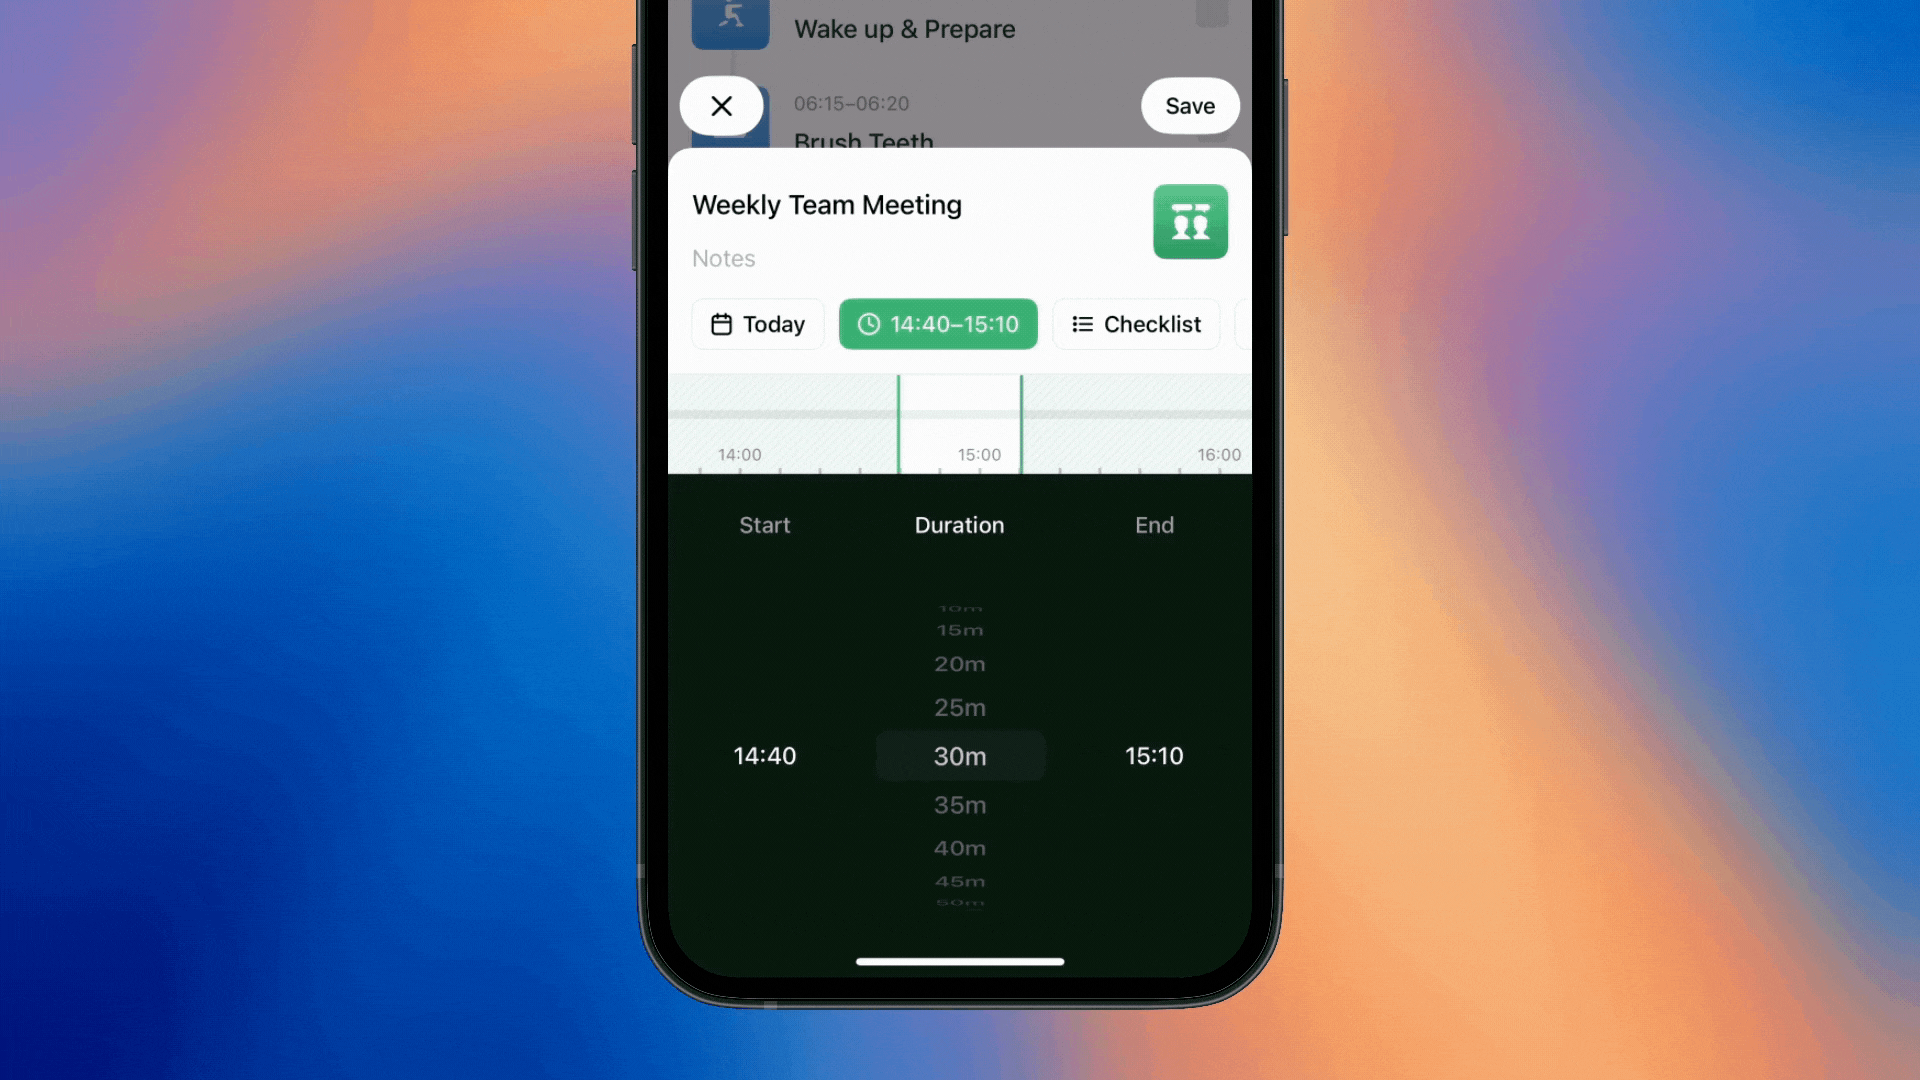
Set the time frame:
If your task is assigned to a specific date, you can arrange a specific time frame for it in your day:
Choose a start time,
Adjust the duration or set the end time as your preference.
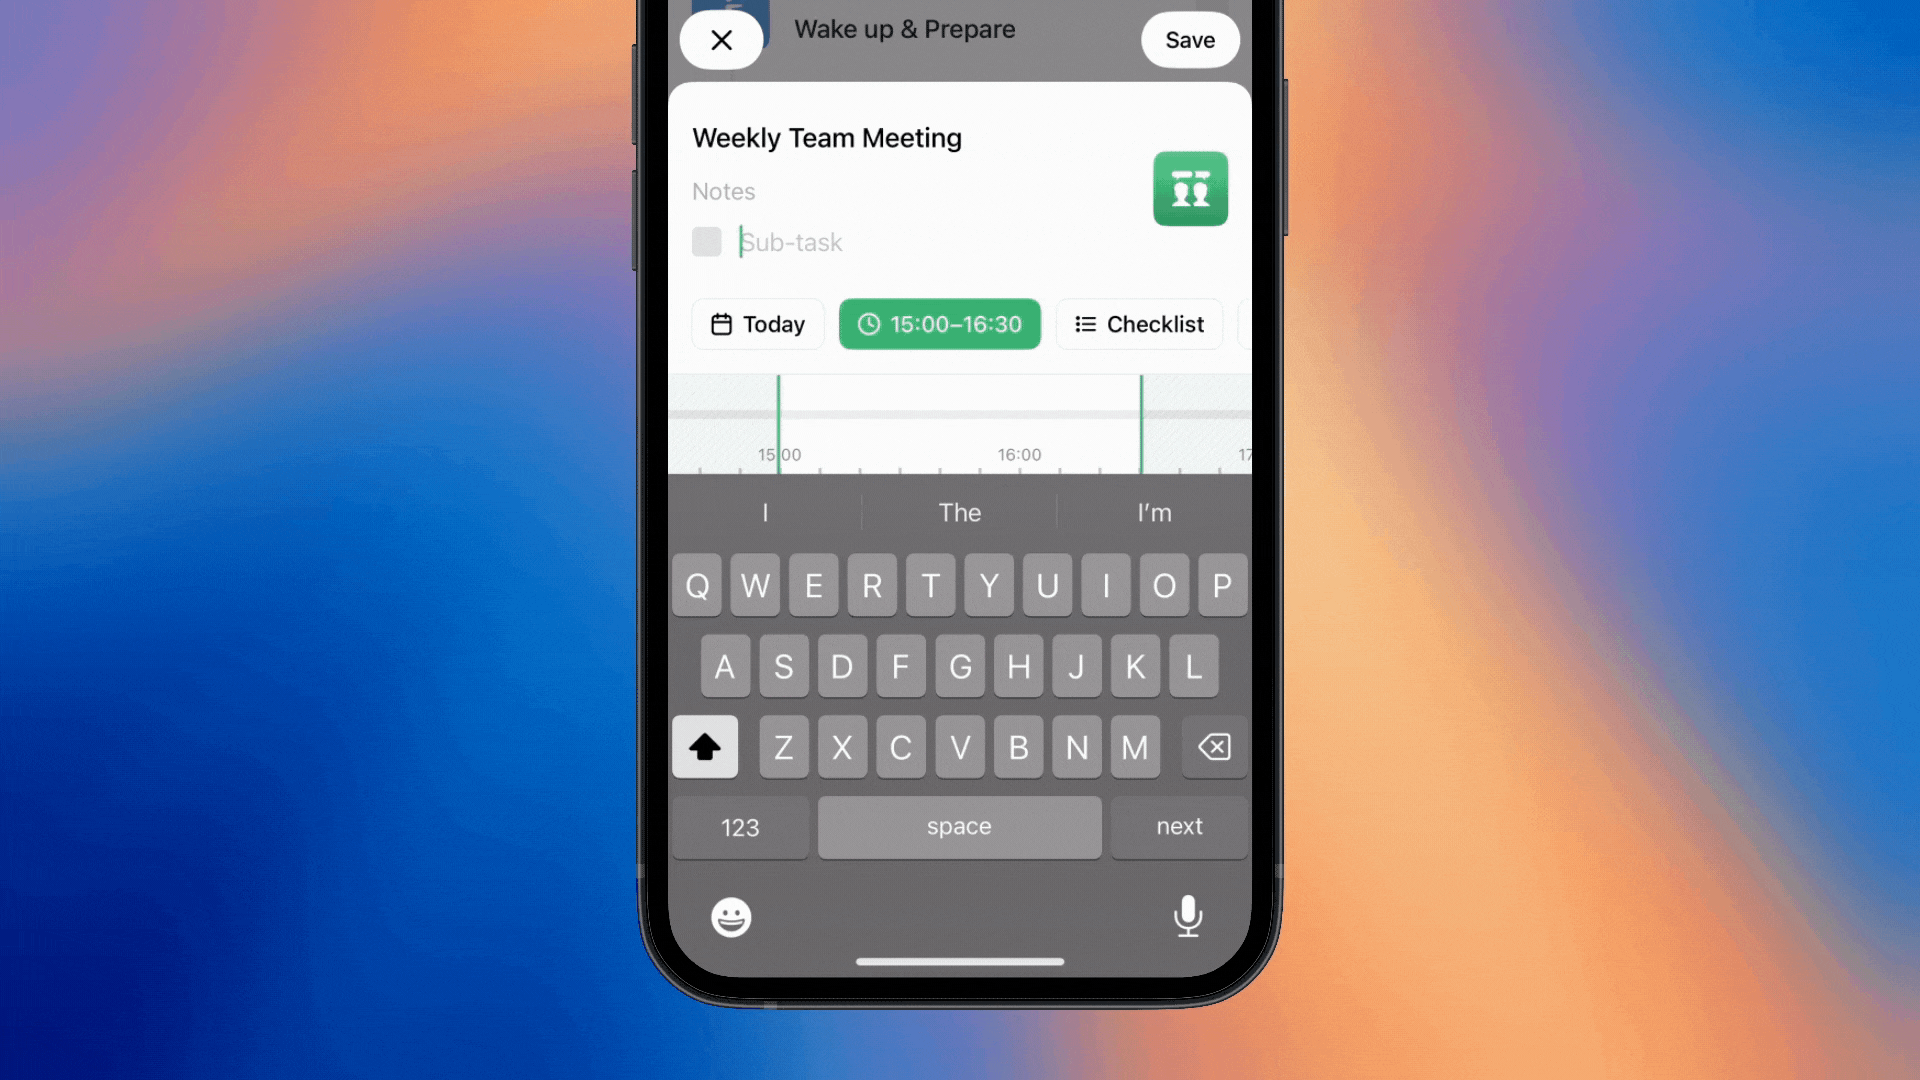
Step 3: Add Details
Subtasks
If your task includes several sub-tasks, you can save them as well. Whether it's steps for a project or items for your shopping list, capture every detail to stay organized:
Tap the checklist icon
Write down your subtask, pressing Enter to save it to the list
Recurring Settings
For regular activities like workouts or team meetings, you can configure how frequently it appears on your daily list:
Access the Repeat settings
Choose frequency:
Specific date(s) in a week, or
Every day
PolyPlan handles the scheduling so you don't have to.

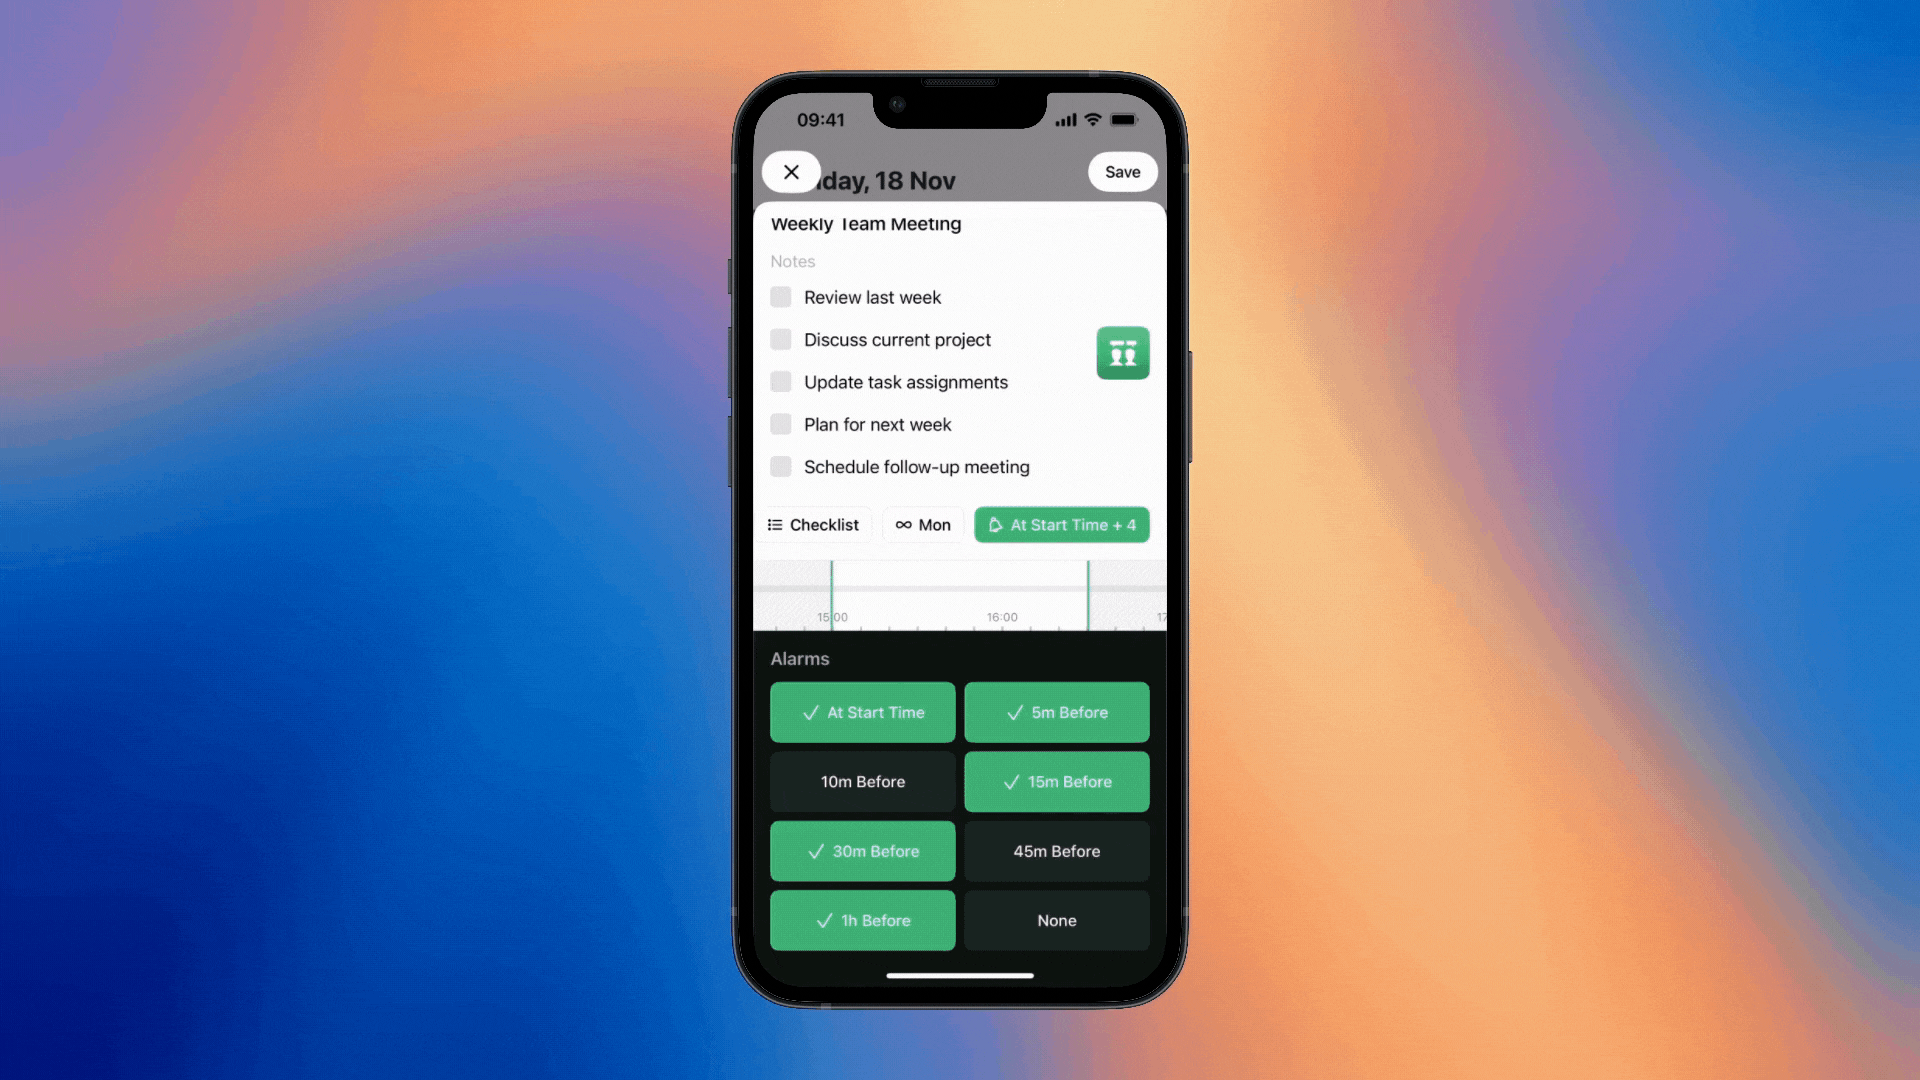
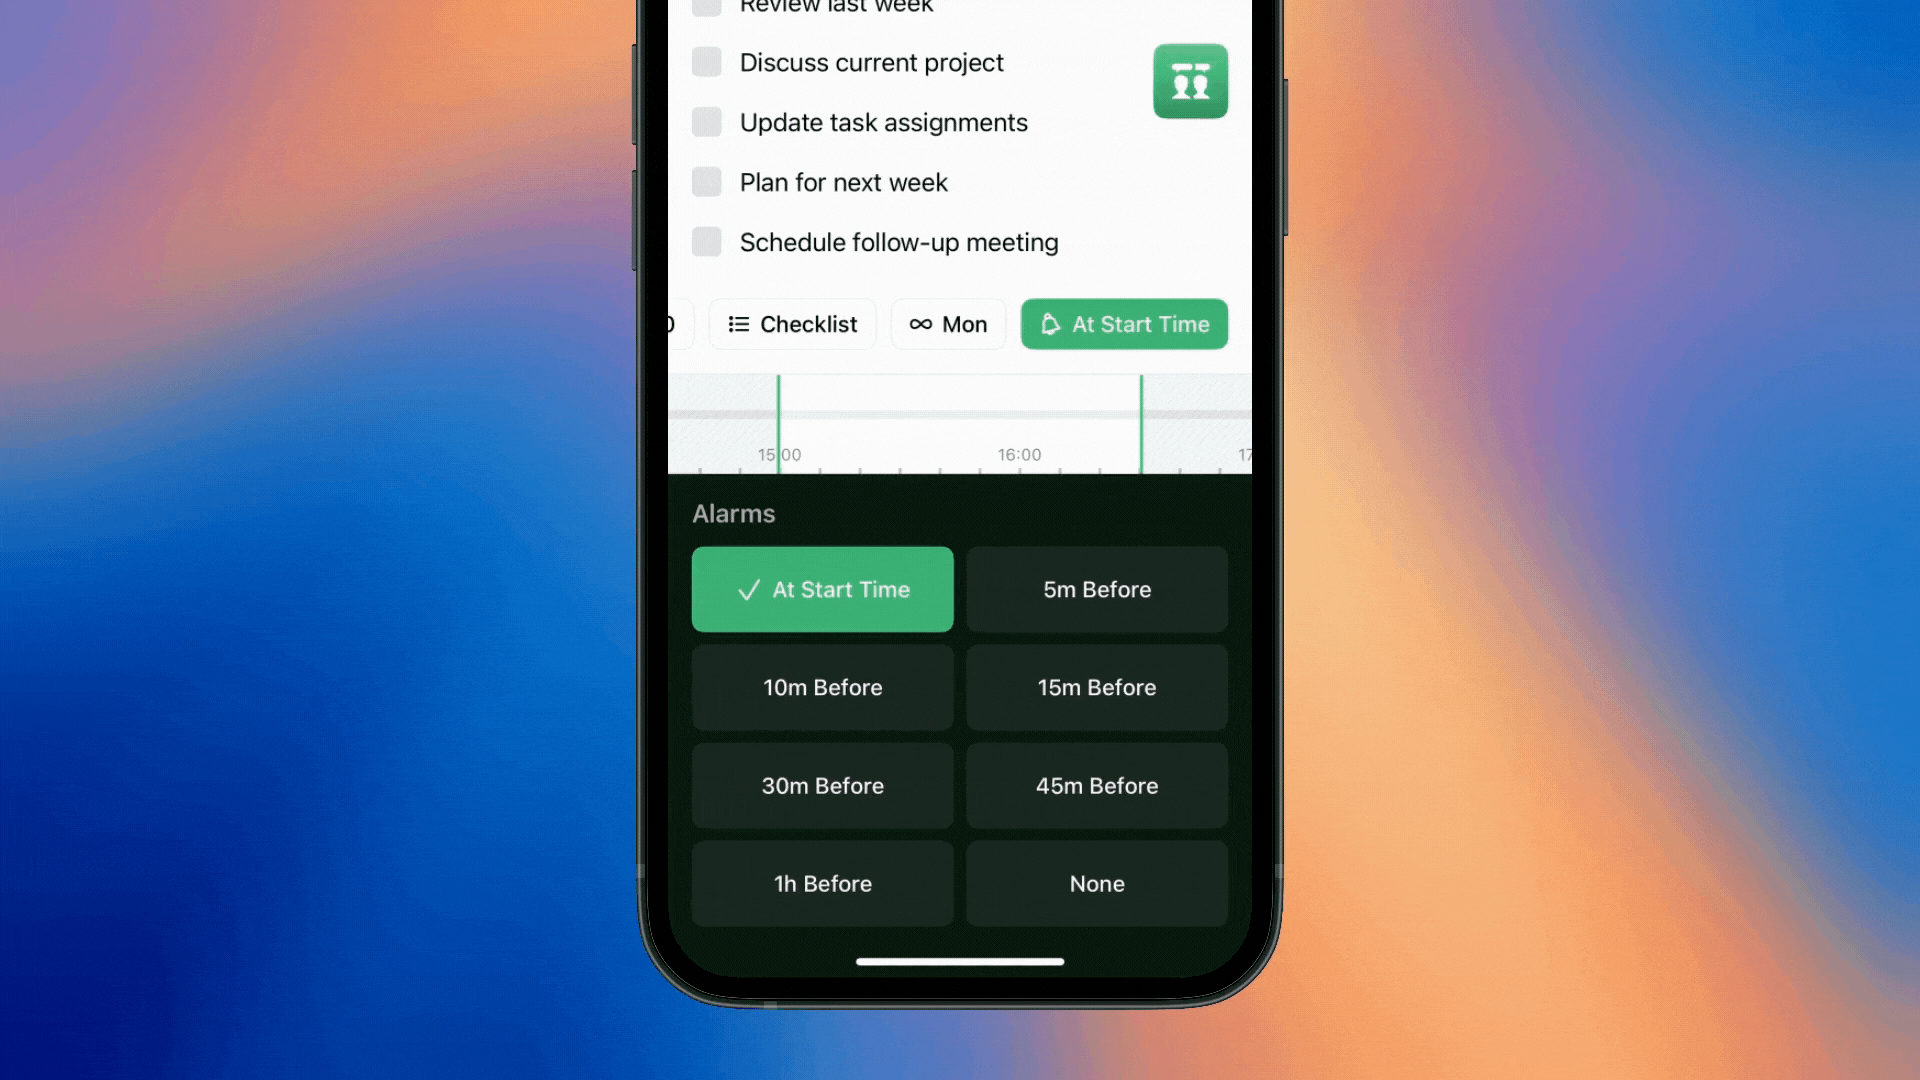
Reminders
Never miss a beat with smart reminders:
Tap the Reminder option
Set multiple reminder times:
Just before the task
Hours ahead
Days in advance
PolyPlan keeps you on track without being overwhelming.
Step 4: Save and Review
With everything set, tap Save to add your task to your timeline. You'll see it fall perfectly into place among your other activities, creating a clear visual flow of your day.